Maple Bar Donuts
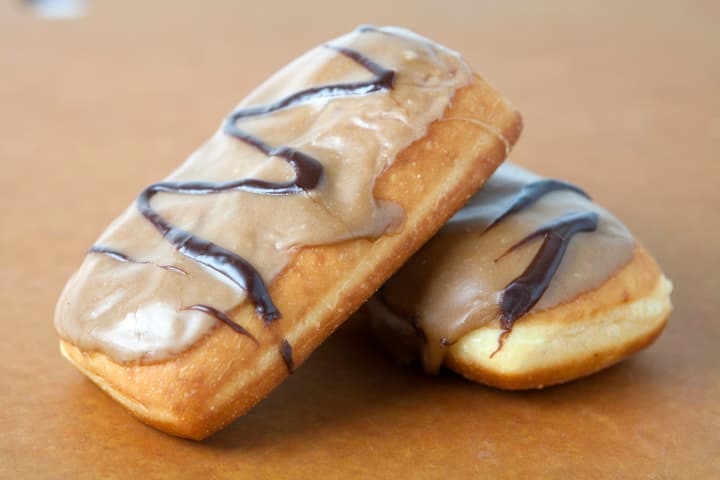
These addicting donuts are a bit of a project, but well worth the effort. Don't skimp on the bacon garnish.
Submitted by: Sandra from 37 Cooks,
Preparation Instructions:
I used a Kitchen Aid stand mixer for this recipe and I recommend you do as well. Either that or an equivalent stand mixer with a dough hook.
Put the yeast, 105°F water and 1 Tablespoon sugar in the bowl of your stand mixer (not attached to the mixer) and stir it vigorously with a whisk. Set it aside for 5 minutes.
In a separate bowl, whisk together the sugars, flour, vital gluten (if using), baking powder, and salt. Set it aside.
Attach the stand mixer bowl and add the Crisco, egg yolks and vanilla. Using your paddle attachment, stir it on a low setting to break up the Crisco. I did this for just at a minute and then I started adding in the dry mixture a little at a time, fully incorporating it into the batter before adding more. When you have added 2/3 of the dry mixture, switch from a paddle to a dough hook, add the rest of the dry ingredients and mix until the dough becomes a ball. Turn the mixer to medium (about 4 on a Kitchen Aid) and let the dough hook work its magic for about 1 1/2 minutes. The dough should be fairly smooth at this point.
Dump the dough ball on a rimmed baking sheet that has a little bread flour sprinkled on it and shape the dough into a rectangular shape about an inch deep. Sprinkle the dough with more bread flour. Cover the pan with a tea towel and set it aside.
Boil some water and fill a 9 x 13 dish about 2/3 of the way full and place it on the bottom of your oven. Then put your covered, rimmed baking sheet with the dough on the middle rack, close the door of the oven and set the timer for 1 hour. Note: Your oven should be completely cool when you do this.
After an hour, your dough will have at least doubled in size. Dump it on your counter or Silpat that has been lightly floured and with a rolling pin, roll the dough into a rectangular shape that is about 11 x 12 inches. Cut 1/2 of an inch of the edge of the dough off with a pizza wheel and discard that dough. Cut the rectangular dough in half lengthwise. Cut 6 bars from each half of the dough. In two rimmed baking sheets sprinkled with flour, place all 12 bars with a little room in between. Be careful when you move the bars from your cutting surface to the baking sheets so you don't change their shape. I used a large metal spatula which was also helpful later when frying the bars. Do not cover the baking sheets with a tea towel this time.
Place the two trays back in your oven and replace the water in your 9 x 13 dish with boiling water. Close the oven and set the timer for one hour.
Fill a large cast iron skillet or other heavy bottom skillet with 2 inches of canola oil and heat the oil over medium-high heat until it reaches 350°F (use a candy thermometer). During the frying process, the temperature may go up or down and you will need to fiddle with the temperature gauge to ensure the constant 350°F temperature of the oil. Don't try to do this without a candy thermometer.
Remove the bars from the oven (they should be doubled in size.) Carefully place 1-2 bars in the hot oil with your metal spatula. Do this gently so you don't splash any oil. Cook one side for 30-45 seconds and then gently flip the bars over and cook for 20-30 seconds. The bars should be a light golden color. Carefully remove the bars to a cooling rack that has paper towels underneath to catch the excess oil. Repeat this process, maintaining the 350°F temperature of the oil, until all 12 bars are cooked. Allow the bars to cool completely, about 20 minutes.
While the bars cool, put the agar in a bowl with 1/3 cup room temperature water and stir it occasionally until the agar is completely dissolved into the water. This will take a while - maybe 15 minutes or so. In the meantime, put all of the rest of the icing ingredients, except the boiling water, in the mixing bowl. Turn on your kettle and boil some water and keep it hot so you can boil it right before you need it later on.
Once the bars are completely cooled and you are ready to make the icing, turn on your kettle and boil some water. Then put your water and dissolved agar mixture into a saucepan over medium heat. Stir constantly until the mixture bubbles and thickens. Pour the contents into 1/3 measuring cup. Take the kettle of boiling water and fill the water to the top of the 1/3 measuring cup and pour the contents into the mixing bowl, scraping until every last bit gets into the mixing bowl.
Mix on low to medium speed until combined. You want to mix the icing quickly because as the icing cools, the agar will cause it to begin to set. Do not make the icing until you are ready to dip the bars!
Dip the rounded side in the icing and let it drip off before flipping over and placing back on the cooling racks for about 10 minutes. Serve immediately. Then eat. And eat. And eat.
thespicehouse.com
More About This Recipe
*Check the protein content of your bread flour. If the protein content of the bread flour is 12% or less, add 2 tablespoons of vital wheat gluten to your dry ingredients. You can skip this ingredient, but your maple bars will be more on the cakey side than on the chewy side. With a yeast doughnut, we're going for chewy! Agar helps your icing to set quickly and it really makes a difference! I made it with and without the Agar and I am not an Agar fan! If you use Agar, you will notice that your icing is thicker, sets pretty much immediately, and does not drip. For Maple-Espresso Icing, use 1/3 cup strong, cooled coffee instead of water to dissolve agar, and add 1/4 teaspoon espresso powder.
Comments